

Securing your home lab using VPN and Tailscale
Over the last several years my home lab has grown from a single Raspberry Pi 4 to several in a Docker Swarm cluster. As the number of apps being hosted on that cluster has also grown I’ve wanted to start to access these remotely without having to open up ports on my router. The requirements I had for the VPN were
- Can be deployed as a Docker Container
- Docker image must support ARM for the RPIs
- Can be deployed using Docker-Compose to document and automate the process
- An administration UI to manage multiple devices connecting to the VPN network
Initial attempts
OpenVPN AS (Access Server)
When I initially started looking for VPN servers, OpenVPN was still very popular and I’d used it previously on bare-metal servers. There was even a popular ARM-based image on Docker Hub with decent documentation to get started. However, there were a few issues:
- ARM support was not widely available and so there were little to no security patches
- The server required an init making it difficult to deploy using Docker-Compose
- At the time there were no ARM-based web UIs
Wireguard
Wireguard has been around for several years but is the latest VPN protocol which offers improved speeds over OpenVPN as well as better security. One of the features of Wireguard is that it runs in the kernel-space which is part of the reason for the performance improvements. However, with Wireguard running in the kernel, this goes against how Docker works in that the containers share the kernel with the host meaning that to run Wireguard requires kernel modules to be deployed to every host the container could run on.
Ultimately, I made progress using Wireguard but it didn’t truly run in a container. On top of this, at the time, there wasn’t a UI container which supported ARM.
Honourable mentions
Below are a couple of the Docker images I used in setting up Wireguard:
- linuxserver.io Wireguard image - A kernel-based Wireguard server/client which supports ARM and receives regular base image updates
- Wireguard UI - A simple Web UI for Wireguard with ARM support for adding clients complete with QR codes for configuring clients
Tailscale
After struggling to use the kernel-based Wireguard, I stumbled across some articles that [Wireguard-Go, a userspace-based implementation of Wireguard], was in development. Wireguard-Go is used by Tailscale to provide a VPN mesh network in an easy-to-use, freemium service.

Tailscale is installed as a client on each of the devices you want to be part of the mesh e.g. laptops, iPads, iPhones, Androids etc. Each of these clients is known as nodes which negotiates a public/private keypair with the Tailscale Coordination Server to allow every other node to find and communicate securely with it.

This forms a hybrid mesh/hub-spoke network design which is both confusing and very clever! Tailscale’s how it works blog does a great job of explaining this concept.
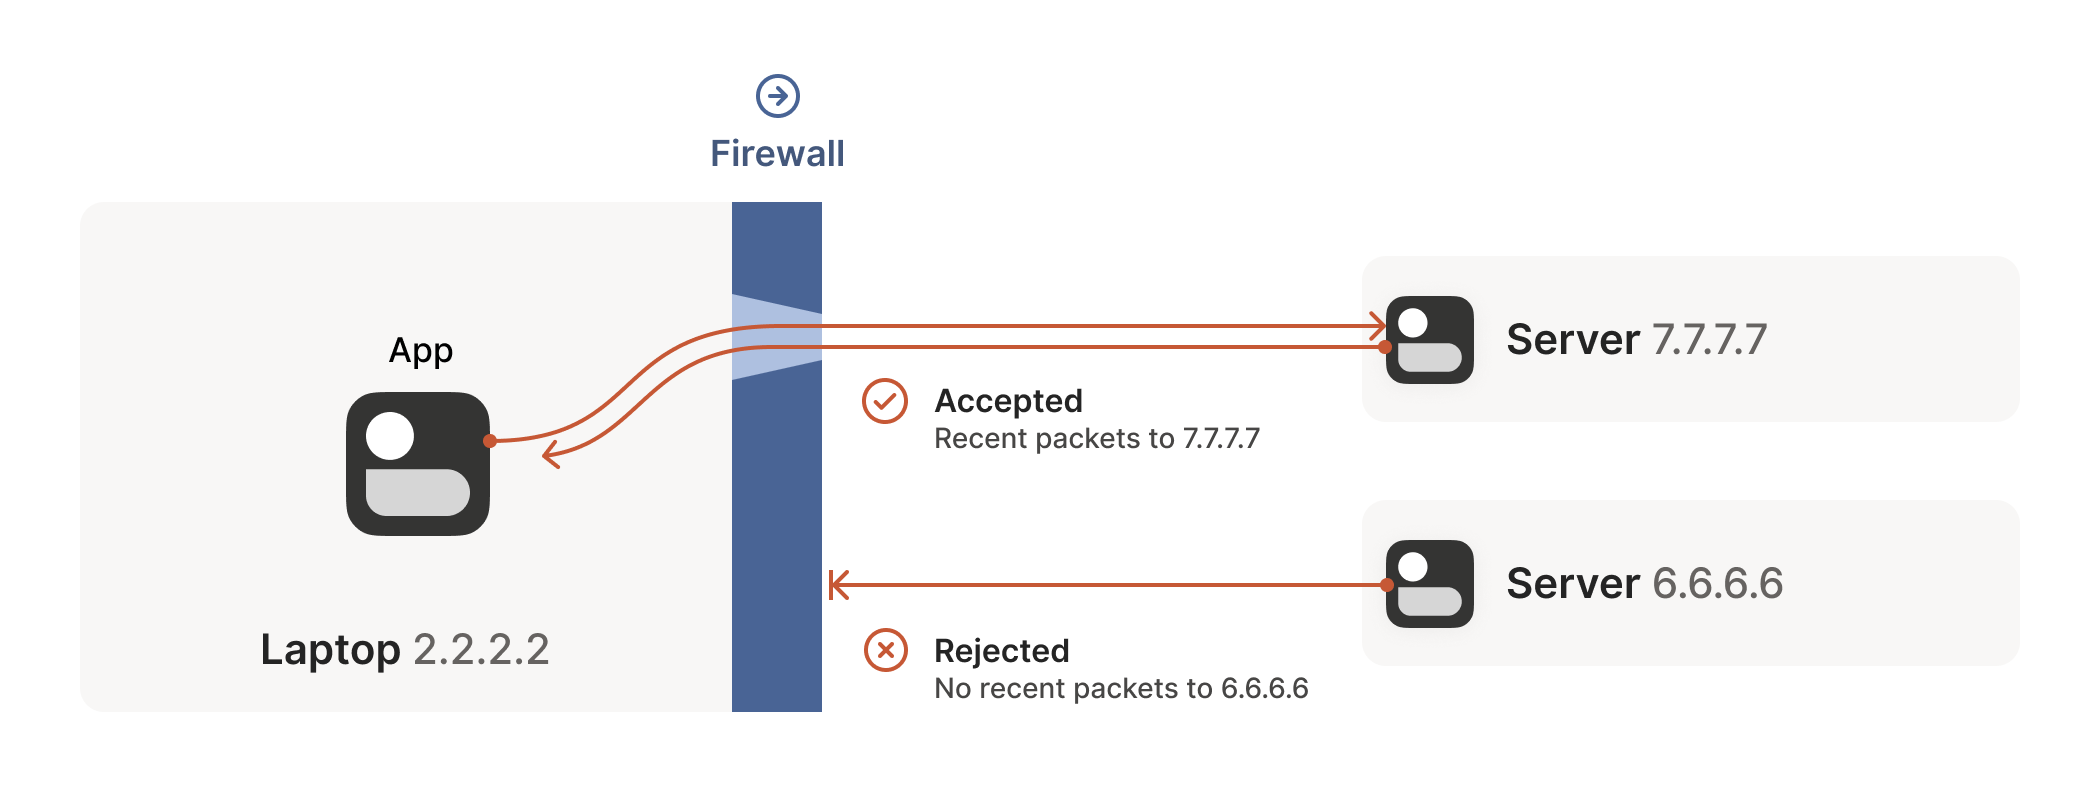
On top of this, Tailscale uses NAT traversal to avoid nodes needing any firewall configuration or public-facing ports being opened. This directly addressed my security concerns at the start of this post!
Deploying as a container
My first 3 requirements were to be able to deploy the VPN server on a Docker host, with ARM support and automate the deployment using Docker-Compose. Fortunately, Tailscale provides a multi-platform image which can run on my RPis. The Docker Hub page now provides good documentation of how to configure the container, however, I have included a copy of the Docker-Compose file I use below.
version: "3.8"

services:
  tailscale:
    image: tailscale/tailscale:v1.34.2
    environment:
      - TZ=Europe/London
      - TS_AUTH_KEY=${auth_key}
      - TS_ACCEPT_DNS=true
      - TS_ROUTES=${home_subnet}
      - TS_STATE_DIR=/var/lib/tailscale
      - TS_USERSPACE=true
      - TS_EXTRA_ARGS=--accept-routes --advertise-exit-node
I’ll highlight a few key details of the above Docker-Compose file:
- TS_AUTH_KEY - This uses an compose environment variable to provide an Auth Key to authorise the container. Typically these need cycling every 90 days.

- TS_ROUTES - As the container is not directly attached to the host network, this setting allows a subnet CIDR to be exposed to the other nodes attached to Tailscale. An example value would be 192.168.0.0/24. This works in conjunction with –accept-routes in TS_EXTRA_ARGS
- TS_USERSPACE - As briefly mentioned in Tailscale, this setting uses Wireguard-Go to avoid host kernel modules meaning the container could spin up on any host in my cluster.
- TS_EXTRA_ARGS –advertise-exit-node - By default the Tailscale client on a device makes other nodes available and resolvable to the client, but general traffic will still go through the device’s default gateway. This setting allows the container to be an exit node which can route all the traffic for another node through it, similar to a traditional VPN.

Tailscale portal
My fourth requirement was to have an administration UI to manage and monitor my VPN network. Below is a sample of the admin console which simply lists all of the nods in your network and their status. There are also pages for monitoring logs, configuring access control, generating API keys as well as Magic DNS which can be used to configure private DNS servers when a device is connected to your Tailscale network.
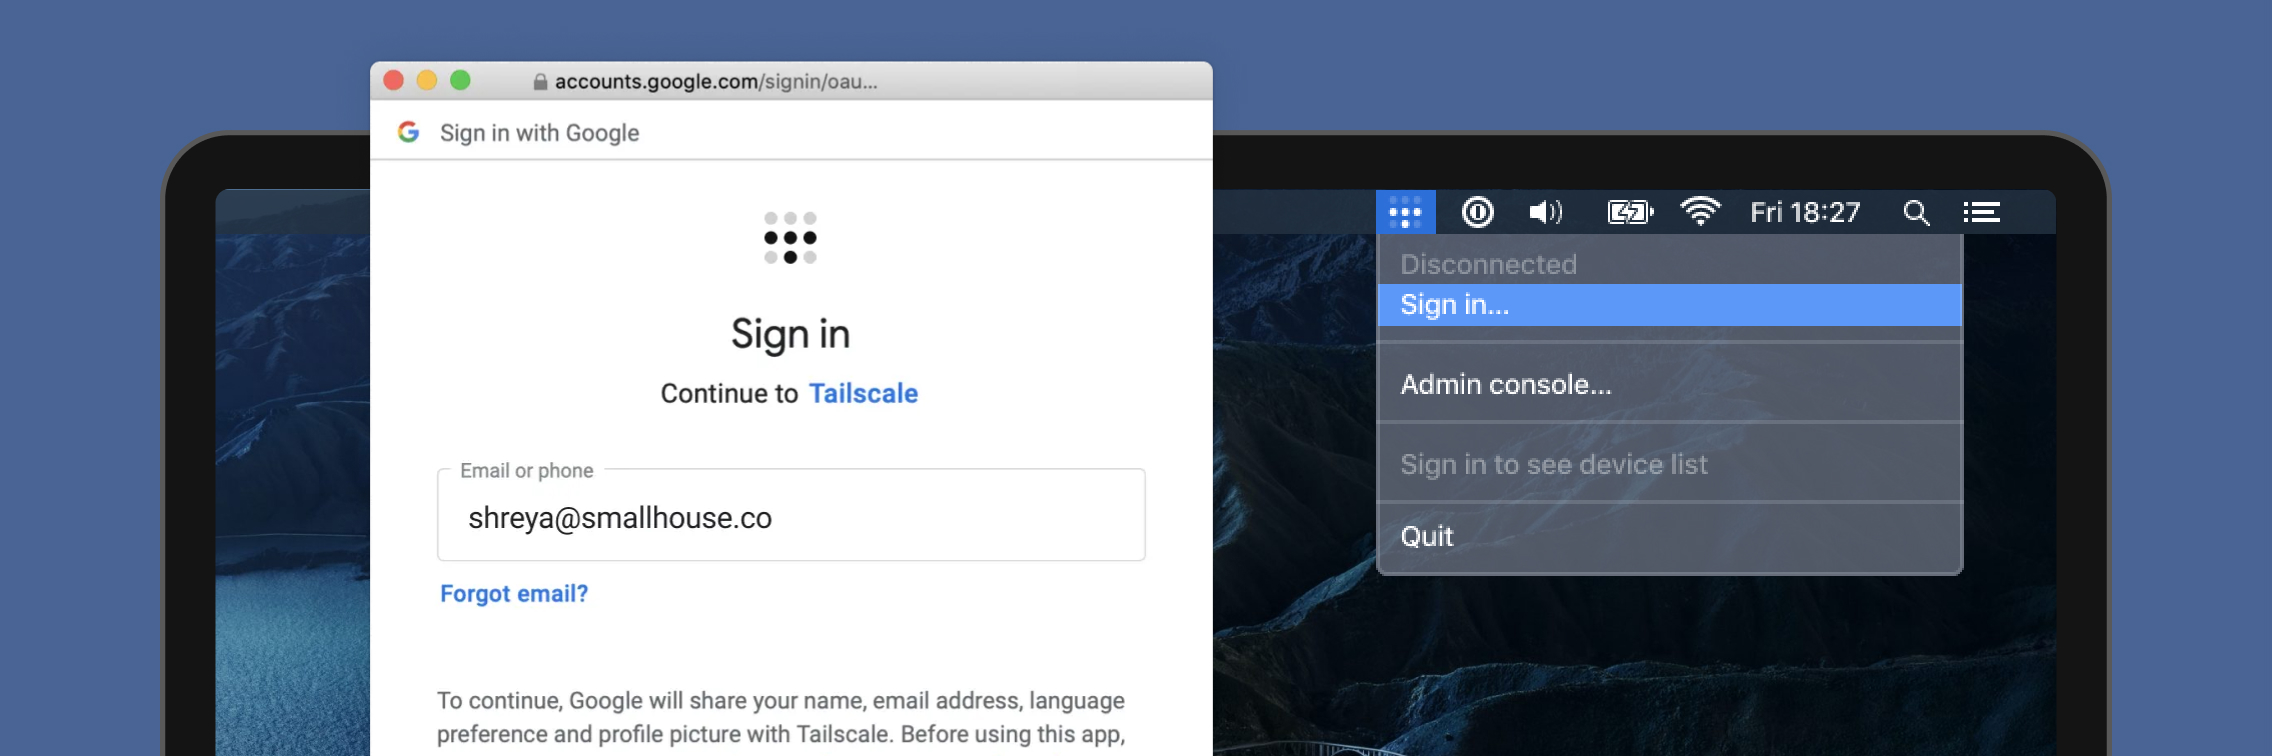
Also, as Tailscale supports SSO, the login process could not be simpler as several identity providers are supported out-of-the-box as configuring your own OIDC and SAML providers.
How much does it cost?
The burning question I’m sure many of you will have is how much does all of this cost? Tailscale offer a variety of pricing tiers to suit your needs. Importantly, Tailscale offers a Personal level for a single user which is FREE!! 🥳
Summary
To sum up, I’ve found Tailscale an incredibly useful and reliable tool over the past year or so of using it. With it being effectively a managed service, I’ve not had to worry about issues with Wireguard, just keeping the Docker image up-to-date and keeping up with renewing API keys. They’ve also been very communicative in notifying customers of vulnerabilities. Below is how Tailscale has met my requirements:
- A multi-platform Docker image is provided which supports ARM
- No initialisation process is needed so can be deployed using Docker-Compose which has allowed me to share my setup with friends
- Tailscale’s admin console is easy to use
- BONUS: Tailscale’s clever NAT traversal means no firewall or public-port opening is required
I’ve started to use some of Tailscale’s other features, such as Magic DNS, which I’ll dig into in a separate post. For now, thank you for your time and hope it’s been useful.
Comments