
Sharing Azure Pipelines Templates
I have been developing build and release pipelines since Team Foundation Server 2015 to deploy ASP.NET and BizTalk Server applications. Over the past couple of years, I’ve migrated to using Azure DevOps source control and pipelines. As the number of pipelines has grown, I’ve started to develop Azure Pipeline Templates to make reusable blocks of automation to simplify and improve the consistency across the pipelines. In this post, I’ll give an introduction to Azure Pipeline Templates as well as how to share these between multiple repos.
Git Repo Sample
For this post, I’ve created a small collection of pipelines and templates which I’ll reference throughout. These can be found in this GitHub repo.
What are Azure Pipelines?
Azure Pipelines automate the building, testing and delivery of code. Pipelines are typically used for Continuous Integration (CI) to run tests automatically when code is committed and pushed, and Continuous Delivery (CD) to deploy code through different environments to allow users to test delivered code quicker.

In recent years there has been a shift to defining pipelines using YAML to allow these pipelines to be included in source control to benefit from tracking changes in the definition as well as using your existing Pull Request (PR) process. Below is the YAML definition for the above pipeline summary.
name: $(Date:yy.MM.dd)$(Rev:.rr)

stages:
  - stage: Build
    jobs:
      - job:
        steps:
          - bash: echo 'Bulding'

          - task: Bash@3
            displayName: Print environment variables
            inputs:
              script: env | sort
              targetType: inline

  - stage: DeployCodeDev
    jobs:
      - job:
        steps:
          - bash: echo 'DeployCodeDev'

  - stage: DeployCodeInt
    jobs:
      - job:
        steps:
          - bash: echo 'DeployCodeInt'

  - stage: DeployNetworkDev
    dependsOn: Build
    jobs:
      - job:
        steps:
          - bash: echo 'DeployNetworkDev'

  - stage: DeployNetworkInt
    jobs:
      - job:
        steps:
          - bash: echo 'DeployNetworkInt'
Some key features of pipelines are:
- Stages - Defines a series of Jobs. If more than one stage is defined, these typically run in sequence
- Jobs - Define a series of Tasks which run in sequence. If more than one job is defined, these typically run in parallel
- Deployment Jobs - This is a special type of Job specifically intended for deploying code
- Steps/Tasks - Defines an action in your pipeline
Together, these features can create blocks of logically grouped functionality to handle building, testing and deploying code. Often, however, many pipelines end up using the same steps resulting in duplication. To avoid this we can make use of Azure Pipeline Templates.
Creating Pipeline Templates
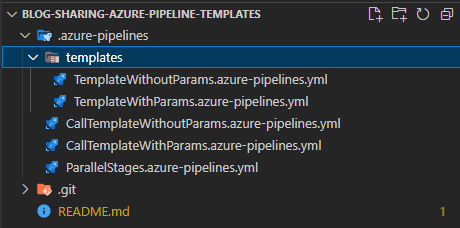
Any pipeline can be called as a template. When creating pipeline templates locally in a repository, I create them alongside the pipelines utilising them to keep the code together. A sample folder structure is below.
The template TemplateWithoutParams.azure-pipelines.yml can be called from a pipeline like below:
stages:
  - template: templates/TemplateWithoutParams.azure-pipelines.yml
Inside the template looks like below:
stages:
  - stage:
    jobs:
      - job:
        steps:
          - task: Bash@3
            displayName: Print environment variables
            inputs:
              script: env | sort
              targetType: inline
In the example we have a templated stage, the same can be done using jobs and tasks.
Adding parameters to templates
Templates can also make use of parameters to further improve their reusability and flexibility. The below sample echoes the values of testParam and defaultParam.
parameters:
  - name: testParam
    type: string
  - name: defaultParam
    type: string
    default: 'World'

stages:
  - stage:
    jobs:
      - job:
        steps:
          - task: Bash@3
            displayName: Print environment variables
            inputs:
              script: env | sort
              targetType: inline

          - bash: echo '${{parameters.testParam}}'

          - bash: echo '${{parameters.defaultParam}}'
The above template can be called as below to demonstrate that defaultParam is optional. Using parameters with default values allows for lots of configuration within a pipeline template whilst keeping pipelines easy to use for basic usage. Common use cases I’ve had is for setting default filemasks for building and testing code e.g. /src/**/*.csproj to encourage consistent folder structures whilst allowing for alternate config to be provided.
stages:
  - template: templates/TemplateWithParams.azure-pipelines.yml
    parameters:
      testParam: Hello
These templates can then be used as blocks of automation and chained together to produce a flow. This style of pipeline will then vastly simplify repetitive tasks which involve multiple stages such as building, testing and deploying applications.
stages:
  - template: templates/TemplateWithoutParams.azure-pipelines.yml

  - template: templates/TemplateWithParams.azure-pipelines.yml
    parameters:
      testParam: Hello
Sharing Templates Centrally
So far we’ve looked into how to create templates to call those from other pipelines, however, this is currently all within a single repository. Often, developers organise code logically into multiple separate repositories. How can Azure Pipeline templates be shared between multiple repositories? Azure Pipelines have support for referencing external repositories to allow running templates from a central repository.
name: $(Date:yy.MM.dd)$(Rev:.rr)

resources:
  repositories:
    - repository: PipelineTemplates
      type: github
      name: milkyware/blog-sharing-azure-pipeline-templates
      endpoint: MilkyWare

stages:
  - template: .azure-pipelines/templates/TemplateWithoutParams.azure-pipelines.yml@PipelineTemplates

  - template: .azure-pipelines/templates/TemplateWithParams.azure-pipelines.yml@PipelineTemplates
    parameters:
      testParam: Hello
The above example references itself to mock referencing an external resource, however, the same code could be copied to a pipeline in another repo and still work. I’ll highlight a few features:
- repository - This is an arbitrary name given to the repository to use when specifying which template to use
- type - Azure Pipelines support several Git repo types
- name - The name of the repository within your source control platform
- endpoint - The name of the Azure DevOps service connection to use to authenticate to the external repository
- When calling the template, the path is suffixed with the @repository notation. Also, when specifying the path, it’s in the context of the root of the remote repository.
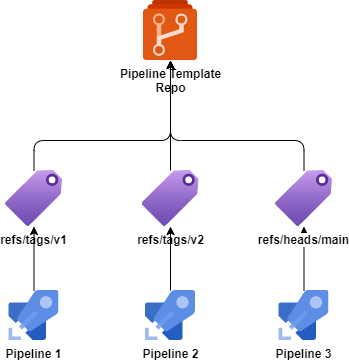
Pipeline Template Versioning
Now that we’ve seen how these pipeline templates can be stored in a central repository and referenced by pipelines in other repositories, one of the questions that arise is “how do we avoid breaking users of the templates as changes are made”? The example in sharing templates centrally can be extended to use the ref property.
resources:
  repositories:
    - repository: PipelineTemplates
      type: github
      name: milkyware/blog-sharing-azure-pipeline-templates
      ref: refs/tags/v1
      endpoint: MilkyWare
The ref property allows specifying a specific version/commit of the remote repository to reference. When the top-level pipeline is run, it will look like the below. Notice that 2 sources are shown due to 2 versions of the same repo now being referenced.
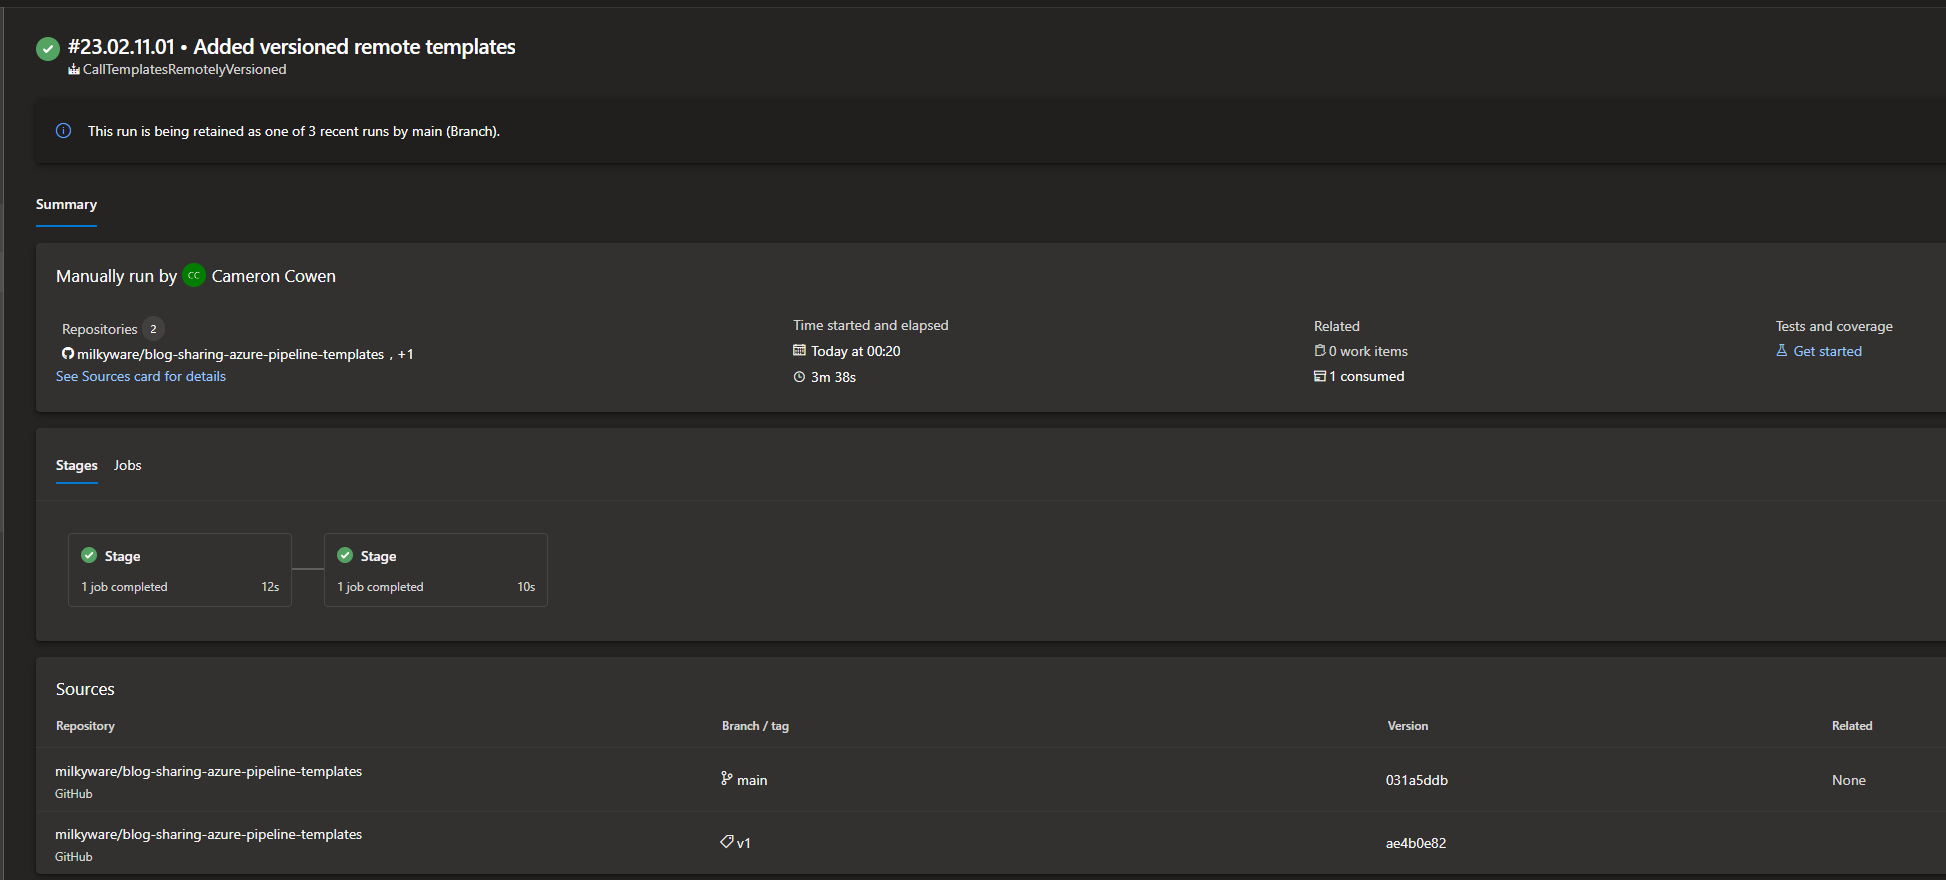
This allows the pipeline template repository to be used like a package management service where different versions of the repository can be referenced by different pipelines. This means that if any breaking changes are made to a template, its existing consumers are protected.
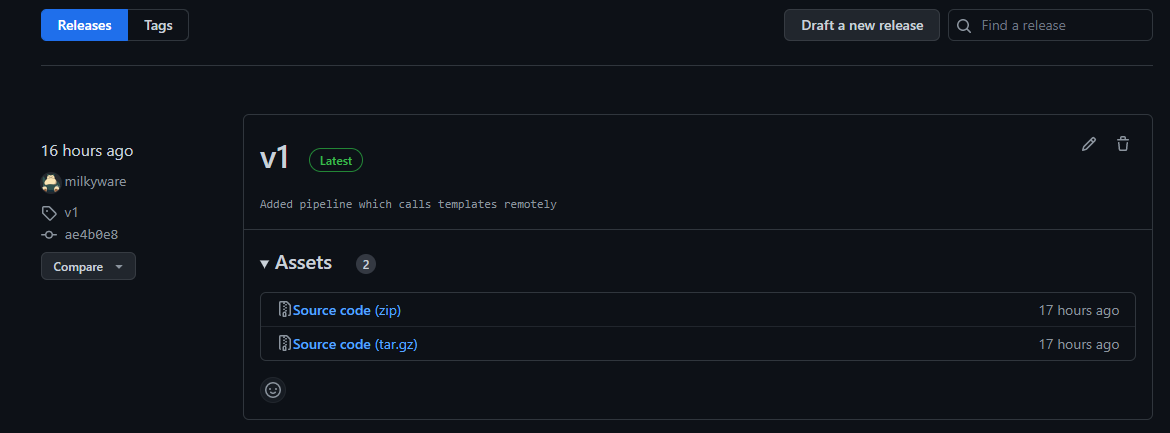
Tagging in GitHub
In GitHub, the versioning can be handled by the existing releases functionality which creates a Git tag for each release. GitHub Actions such as GitHub Tag Bump can also be used to automate the creation and pushing of tags on events such as PRs completing.
Tagging in Azure Repos
As for Azure DevOps repositories, similar to GitHub, the tags can be created manually.

Tags can also be created automatically when pipelines complete. This out-of-the-box functionality can be configured with the below steps:
- Select your pipeline
- Edit the pipeline
- Expand the … menu and select Triggers
- On the YAML tab select Get Sources
- Configure the tag format and when to tag the sources
The limitation to this approach is that these tags are tied to the Azure Pipelines retention policy which will automatically delete tags created by pipelines. To resolve this, I created a GitTag pipeline template which uses azure-devops extension for az cli.
- task: PowerShell@2
  displayName: Az DevOps Tag Repo
  env:
    AZURE_DEVOPS_EXT_PAT: $(System.AccessToken)
  inputs:
    pwsh: true
    targetType: inline
    script: |
      $ref = git log -1 --format="%H"
      az repos ref create --name "tags/$" --object-id $ref --org $(System.CollectionUri) --project $(System.TeamProject) --repository $(Build.Repository.Name)
This task will stamp the repo of the calling pipeline with a permanent tag which is exempt from the pipeline retention policies.
Summary
During this post we’ve:
- Introduced Azure Pipelines
- Shown how to use pipelines as templates in other pipelines
- Looked at how multiple templates can be used together to simplify complex flows
- How to share these templates from a central repository
- Lastly, we’ve looked at making use of tagging to version the templates and protect other pipelines
In this post we’ve used simple code examples to demonstrate the concept, however these templates could contain multiple steps, jobs and stages with multiples of these templates strung together. Hope this has been useful. Please feel free to leave comments below.
Comments