
Adding Release Please
I’ve been using the Microsoft Graph SDK in various projects for a while now and recently noticed Release Please being used to automate its releases. Preparing releases and ensuring they’re accurate can be time-consuming, especially when commit messages follow different styles. Automating the release process and ensuring consistency is something I’ve wanted to explore for a while.
Release Please is a tool that automates the release process by generating changelogs, creating GitHub releases, and managing version numbers based on commit messages. In this post, I’ll introduce Release Please, explain how I’ve implemented it in my projects, and show how I’ve added validation to ensure pull request commits remain consistent and conform to Release Please conventions.
Introducing Release Please
Release Please is a Google project that monitors the commits of a GitHub repository and automates:
- CHANGELOG generation
- Creation of GitHub releases
- Calculation of version numbers
To do this, Release Please looks for commit messages conforming to the Conventional Commits spec. This is a set of rules on how to structure messages to create an explicit git history and indicate the type of change in the project. The general structure of Conventional Commits is:
<type>[optional scope]: <description>

[optional body]

[optional footer(s)]
Often, just the top part of the message is needed. Generally, the most common types are fix: and feat:, corresponding to patch and minor version changes, respectively. In addition, suffixing a type with ! (e.g. feat!:) indicates a breaking change, which corresponds to a major version change.
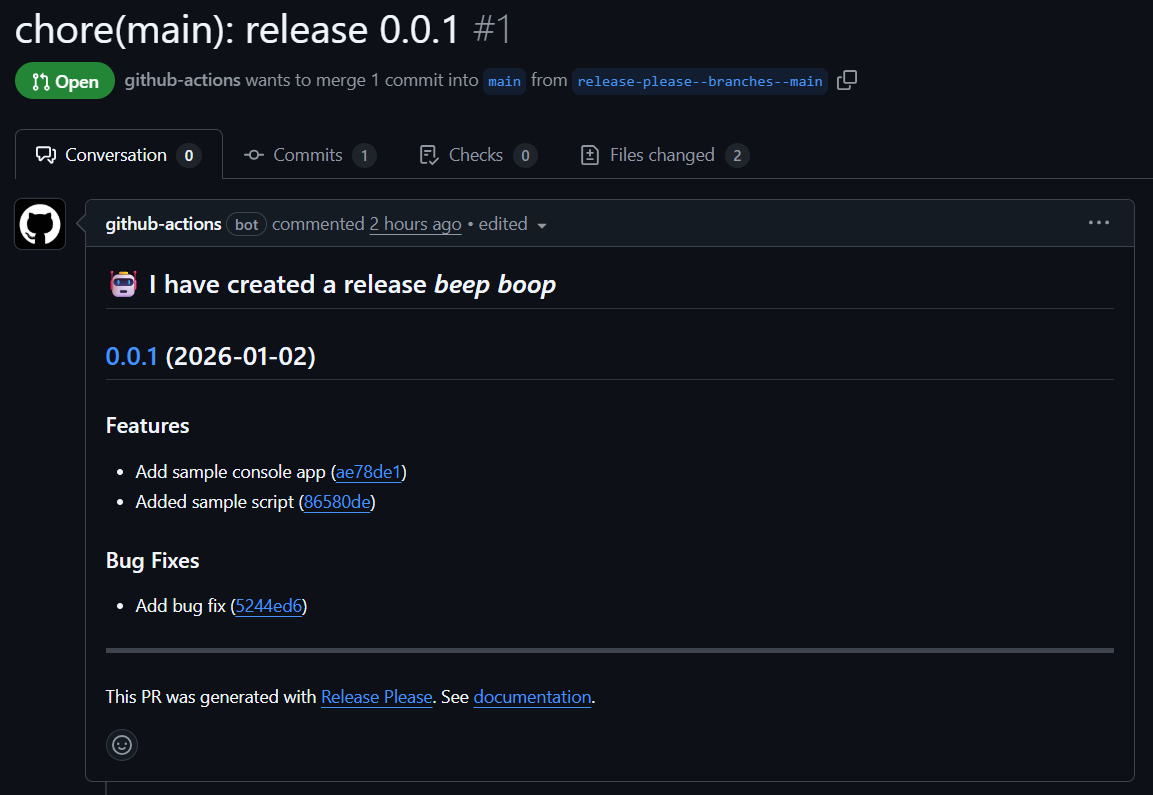
Conventional Commits will then trigger Release Please to create a release Pull Request containing a summary of the changes made since the last release, along with calculating the next version number based on the types of changes made. As part of the release PR, a CHANGELOG.md will be created or updated, containing the same details as the PR description to create a single history of the changes.
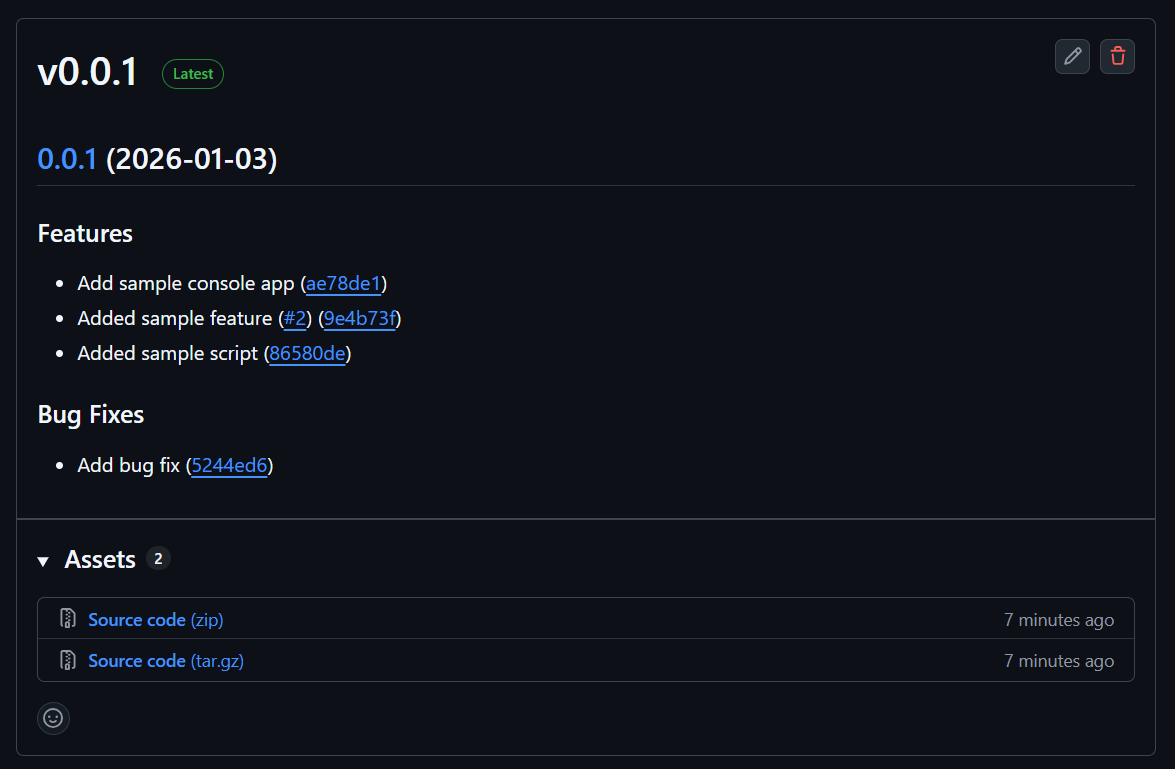
Merging this PR then triggers a GitHub release to be created, along with the associated Git tag. So let’s have a look at how to set it up.
Preparing the Repo
Before setting up Release Please, there are some prerequisites. First, it is recommended to use squash merges when merging PRs to maintain a linear Git history.
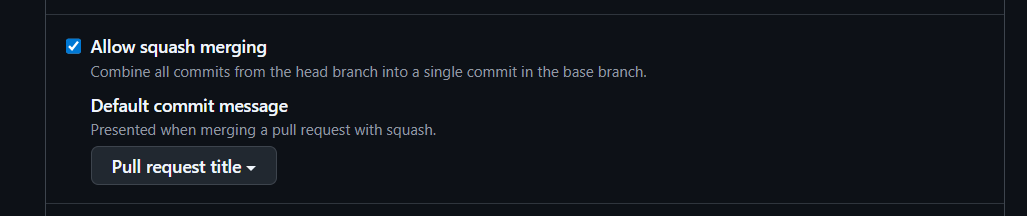
To ensure squash merges are enabled, go to General -> Pull Requests in the repo settings. Also, ensure that the default commit message is set to at least Pull request title so that the Conventional Commit can be set as the PR title, which we can validate later on.
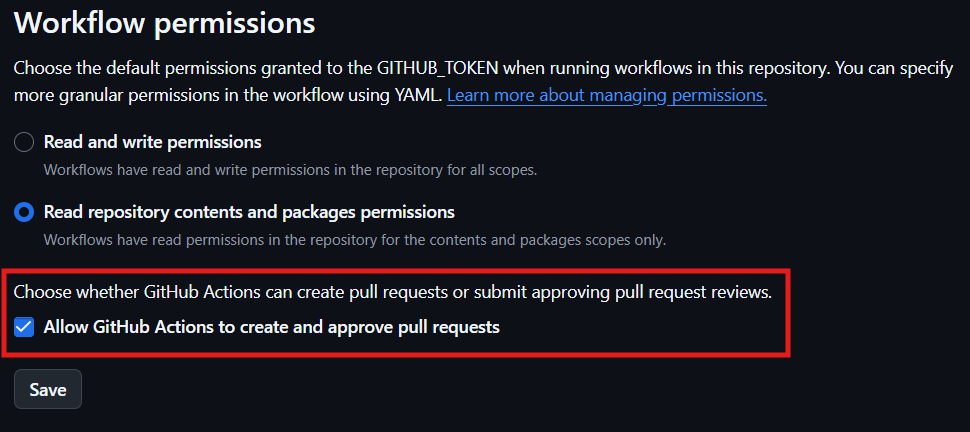
Second, to allow Release Please to create and manage Release PRs, GitHub Actions need permission to create PRs. This can be enabled in the repo settings under Actions -> General -> Workflow permissions.
Configuring Release Please
With the repo prepared, we can now configure Release Please. This involves creating two files: release-please-config.json (to configure Release Please) and .release-please-manifest.json (to track versions).
npm i release-please -g
Although these files can be created manually using samples (such as those from MS Graph), the release-please CLI makes this process easier. Let’s install the package.
$ghToken = "contents-pr-read-write-pat-token"
release-please bootstrap --token $ghToken `
  --repo-url=username/repo-name `
  --release-type=simple `
  --bump-minor-pre-major=true `
  --bump-patch-for-minor-pre-major=true
Once installed, we can then run the CLI. You’ll need a token to authorise the creation of the bootstrap PR. This could be from the GitHub CLI using gh auth token or a PAT token, which can be created under your GitHub account settings, with read/write access to Contents and Pull requests.
> Fetching .release-please-manifest.json from branch main
> Fetching release-please-config.json from branch main
√ Starting GitHub PR workflow...
√ Successfully found branch HEAD sha "6bf1cb2d415637b225b54cfb73a1f1bbb7a22567".
√ Successfully created branch at https://api.github.com/repos/milkyware/blog-release-please/git/refs/heads/release-please/bootstrap/default
√ Got the latest commit tree
√ Successfully created a tree with the desired changes with SHA 95f20137c7cdc3c31510182e16230a692180d94a
√ Successfully created commit. See commit at https://api.github.com/repos/milkyware/blog-release-please/git/commits/b1af4e0fbebd80fd67b0492beaec0f67518dd9b4
√ Updating reference heads/release-please/bootstrap/default to b1af4e0fbebd80fd67b0492beaec0f67518dd9b4
√ Successfully updated reference release-please/bootstrap/default to b1af4e0fbebd80fd67b0492beaec0f67518dd9b4
√ Successfully opened pull request available at url: https://api.github.com/repos/milkyware/blog-release-please/pulls/1.
√ Successfully opened pull request: 1.
{
  headBranchName: 'release-please/bootstrap/default',
  baseBranchName: 'main',
  number: 1,
  title: 'chore: bootstrap releases for path: .',
  body: 'Configuring release-please for path: .',
  files: [],
  labels: []
}
The output of the command should look similar to above, with a pull request being created that initialises the config and manifest files.
{
  "packages": {
    ".": {
      "changelog-path": "CHANGELOG.md",
      "release-type": "simple",
      "bump-minor-pre-major": true,
      "bump-patch-for-minor-pre-major": true,
      "draft": false,
      "prerelease": false
    }
  },
  "$schema": "https://raw.githubusercontent.com/googleapis/release-please/main/schemas/config.json"
}
The config file in the PR should look similar to above. Notice that the arguments specified in the command appear under the . object within packages. This is because Release Please supports both monorepo and polyrepo architectures, where . indicates that the component being versioned is the entire repo. In a monorepo setup, the --path argument can be used on the CLI to configure additional components in the same repo by specifying the path of the component, such as --path=lib/my-versioned-component. The JSON schema is also referenced to support intellisense when editing the config.
{
  ".": "0.0.0"
}
The manifest file should look similar to above. The key(s) should match those under packages in the config file (in our case, this is .). The version on the right tracks the current version for that component; typically, this should match the Git tags.
N.B. If the current version doesn’t have a corresponding tag, Release Please will fall back to 1.0.0. This is particularly important when working with 0.x.x versions, as without a tag matching the manifest, Release Please will jump to 1.0.0. If onboarding a repo without any tags, create the initial tag (e.g., 0.0.0) and update the manifest or use the
--initial-versionargument.
Automating Releases
With the repo prepared and Release Please configured, we can now set up the automation. Release Please is available as a GitHub Action, so the automation just involves setting up a GitHub Workflow.
name: Release Please

on:
  push:
    branches:
      - main
  workflow_dispatch:

permissions:
  contents: write
  pull-requests: write

jobs:
  release-please:
    runs-on: ubuntu-latest
    steps:
      - name: Checkout repository
        uses: actions/checkout@v6

      - uses: googleapis/release-please-action@v4
        with:
          token: $
This workflow is very similar to the one documented by the GitHub Action, with the additional inclusion of the actions/checkout@v6 step. This ensures that the config and manifest are available to the Release Please action.
As Conventional Commits are added to main via PRs, Release Please will automatically prepare the release PR like the one shown earlier. Once you’re happy with the release, you can merge it to trigger the actual GitHub release. However, how can you ensure that PRs do follow the Conventional Commits syntax?
Validating PR Titles
As we set up the repo earlier to use squash merges and for PR commits to default to the PR title, we can validate that.
name: Validate PR Title

on:
  pull_request_target:
    types:
      - opened
      - edited
      - reopened
      - synchronize

jobs:
  job:
    runs-on: ubuntu-latest
    permissions:
      pull-requests: write
    steps:
      - name: Semantic PR Title Check
        uses: amannn/action-semantic-pull-request@v6
        id: semantic-pr
        env:
          GITHUB_TOKEN: $
There are a few GitHub Actions available that can validate a PR title against the Conventional Commit format. The one I’ve opted for is action-semantic-pull-request.

The basic setup for the action is really simple, but it has plenty of customisation available if needed. When the step runs, it will either complete successfully (indicating the title is valid) or throw an error similar to above.
- name: Label PR
  if: always()
  shell: pwsh
  env:
    GH_TOKEN: $
  run: |
    $InformationPreference = 'Continue'
    if ($env:RUNNER_DEBUG)
    {
        $DebugPreference = 'Continue'
        $VerbosePreference = 'Continue'
    }

    $label = "invalid-pr-title"
    $prNumber = $

    $errorMessage = @"
    $
    "@
    Write-Verbose "errorMessage: $errorMessage"

    if ([string]::IsNullOrEmpty($errorMessage))
    {
        gh pr edit $prNumber --remove-label $label --repo $ | Out-Null
        Write-Information "PR title is valid. No label applied."
        return
    }

    $labels = gh label list --repo $ --json name | ConvertFrom-Json | Select-Object -ExpandProperty name

    $exists = $labels -contains $label
    if (-not $exists)
    {
        gh label create $label --repo $ | Out-Null
    }

    gh pr edit $prNumber --add-label $label --repo $ | Out-Null
    Write-Information "PR title is invalid. Applied label '$label'."
In addition, I’ve also added a custom script that will check the output of the title check step and add or remove an invalid-pr-title label to or from the PR, depending on whether the PR title is valid. This makes it clear from the PR overview screen if any PRs need attention.
Sample Repo
I’ve prepared a small sample repo with my setup of Release Please.

Wrapping Up
In this post, we’ve explored how to automate releases using Release Please and integrate it into your workflow with GitHub Actions. By setting up Release Please, you can streamline the release process, reduce manual effort, and ensure consistency across your projects. We’ve looked at configuring the tool, preparing your repository, and automating releases with a simple workflow. I hope this guide has been helpful and encourages you to try out Release Please in your own projects. As always, feel free to share your experiences or questions in the comments below.
Comments